Showing posts with label dinner. Show all posts

Friday, December 11, 2015

GF Marie Callendar's Style Cornbread - Take 1

Melanie informed me that Gluten-Free Mike had been lamenting the loss of Marie Callender cornbread in his life.  I understand. It is indeed a lamentable loss.

And, unlike Spouse 1.0, Gluten-Free Mike can't like the dense, corny cornbread made in cast iron skillets.  No, to Gluten-Free Mike, "cornbread" has only one definition: Marie Callender.

So, what could I say, other than, "Challenge accepted!!"

My first thought was to try incorporating corn and honey into my garbanzo bread. I rejected that idea before even getting home to my mixing bowl.  Instead, I reached for my iPad and started googling. Surely someone had done a GF copycat recipe.  They had. I tried it, and it was good in the way that an over-sweetened box of Jiffy cornbread would be good.

As in, not good enough.

I thought back to the first time I had Marie's bread. I splurted, "This isn't cornbread! It's cake!"

It took me many Sunday lunches of steamed vegetables to accept the idea that having a square of dessert with your steamed vegetables wasn't a bad thing.  And, many more Sunday lunches to come to love the stuff.

So, back to Gluten-Free Mike and the quest for cornbread.

If Marie's is more cake than bread, then I need to understand the ratio differences between quickbread and cake. Fortunately, Spouse 1.0 got me the Ratio book last year for Christmas.

I decided to try something half way between a quickbread and a cake. And, it worked!

Unlike a lot of my recipes, this one is all about specific ingredients and correct technique.  You'll dirty more things when you make this.  But, it is so very worth it.

I haven't heard yet whether the bread passes the Gluten-Free Mike test. But, since everyone else likes it, here it is: The bread and its back story.
Since this is half way between a bread and a cake, use a cake making method.  First, you cream the butter and sugar in your stand mixer until it is very, very creamy.  Scrape the bowl a time or two while it is mixing.
Cream butter and sugar
While the fat and sugar are creaming, prepare the dry ingredients.  Grind the cornmeal in a clean coffee grinder or a high power blender until the cornmeal is warm.  If using the coffee grinder, do it in two stages. Add all dry ingredients to a small mixing bowl and whisk well to combine.

Mix dry ingredients
Mix dry ingredients together

Once the fat and sugar is well creamed, add the eggs and mix until they are well incorporated. Don't over mix. You don't want the eggs to get tough. Scrape the bowl.
 

Add eggs
Add eggs

Add the dry ingredients to the butter and sugar mixture in 2 or three stages, mixing only well enough to incorporate and scraping the bowl a couple of times.


Add dry ingredients
Add dry ingredients
Add the clabbered milk and mix just until incorporated. Gently scrape the bowl once while mixing. The batter will be fluffy and beautiful. 


Add clabbered milk
Add clabbered milk
 
Gently pour the fluffy, beautiful batter into a well-greased 8" pan.  Wet your fingers and gently smooth the batter so that it is evenly distributed. 

gently spread batter in 8 inch pan

Bake and enjoy.  Of course, you'll want to mix up some honey butter to go with this. 


Pamela's Marie-Style Cornbread

Ingredients:

1-2 tsp organic apple cider vinegar
4 ounces goat milk
2 ounces butter, softened but not melted
2 ounces Spectrum organic shortening
4 ounces (1/2 cup) organic sugar
2 large eggs
3 ounces Arrowhead Mills Organic Gluten Free Cornmeal*
3 ounces Authentic Foods Classic Gluten Free Blend**
1 Tbsp baking powder
1 tsp baking soda
1 tsp salt
3/4 tsp xanthan gum

Directions:
  1. Thoroughly grease an 8" square baking pan and preheat oven to 350 (f).
  2. Pour 1-2 tsp apple cider vinegar into cup.
  3. Add goat milk to weigh 4 ounces. Set aside to clabber.
  4. Weigh butter, shortening, and sugar into the mixing bowl and set it to creaming. Scrape bowl periodically.***
  5. Grind cornmeal in a clean coffee grinder or a high powered blender.
  6. Add dry ingredients to a small mixing bowl and whisk to incorporate.
  7. Add eggs to butter-sugar mixture. Mix just enough to thoroughly incorporate. Scrape bowl once while mixing.
  8. Add dry ingredients to the butter-sugar mixture in at least two stages.  Mix just enough to incorporate. Scrape 2-3 times while mixing.
  9. Add clabbered milk, mixing just enough to incorporate.  Scrape bowl once while mixing.
  10. Pour mixture into the prepared baking pan.  Wet fingers and smooth batter evenly in the pan.
  11. Bake 350 for about 25-30 minutes, until toothpick tests done.
Notes

* I love Bob's Red Mill products, and I love the course grind of their cornmeal for other things.  For this bread, you really do need the finer grind of Arrowhead Mills.

** Authentic Foods grinds their brown rice flour more finely than other brands I've used.  This is important for the fluffiness factor. 

*** Be sure to turn your mixer off and unplug it while scraping the bowl. 

Saturday, June 14, 2014

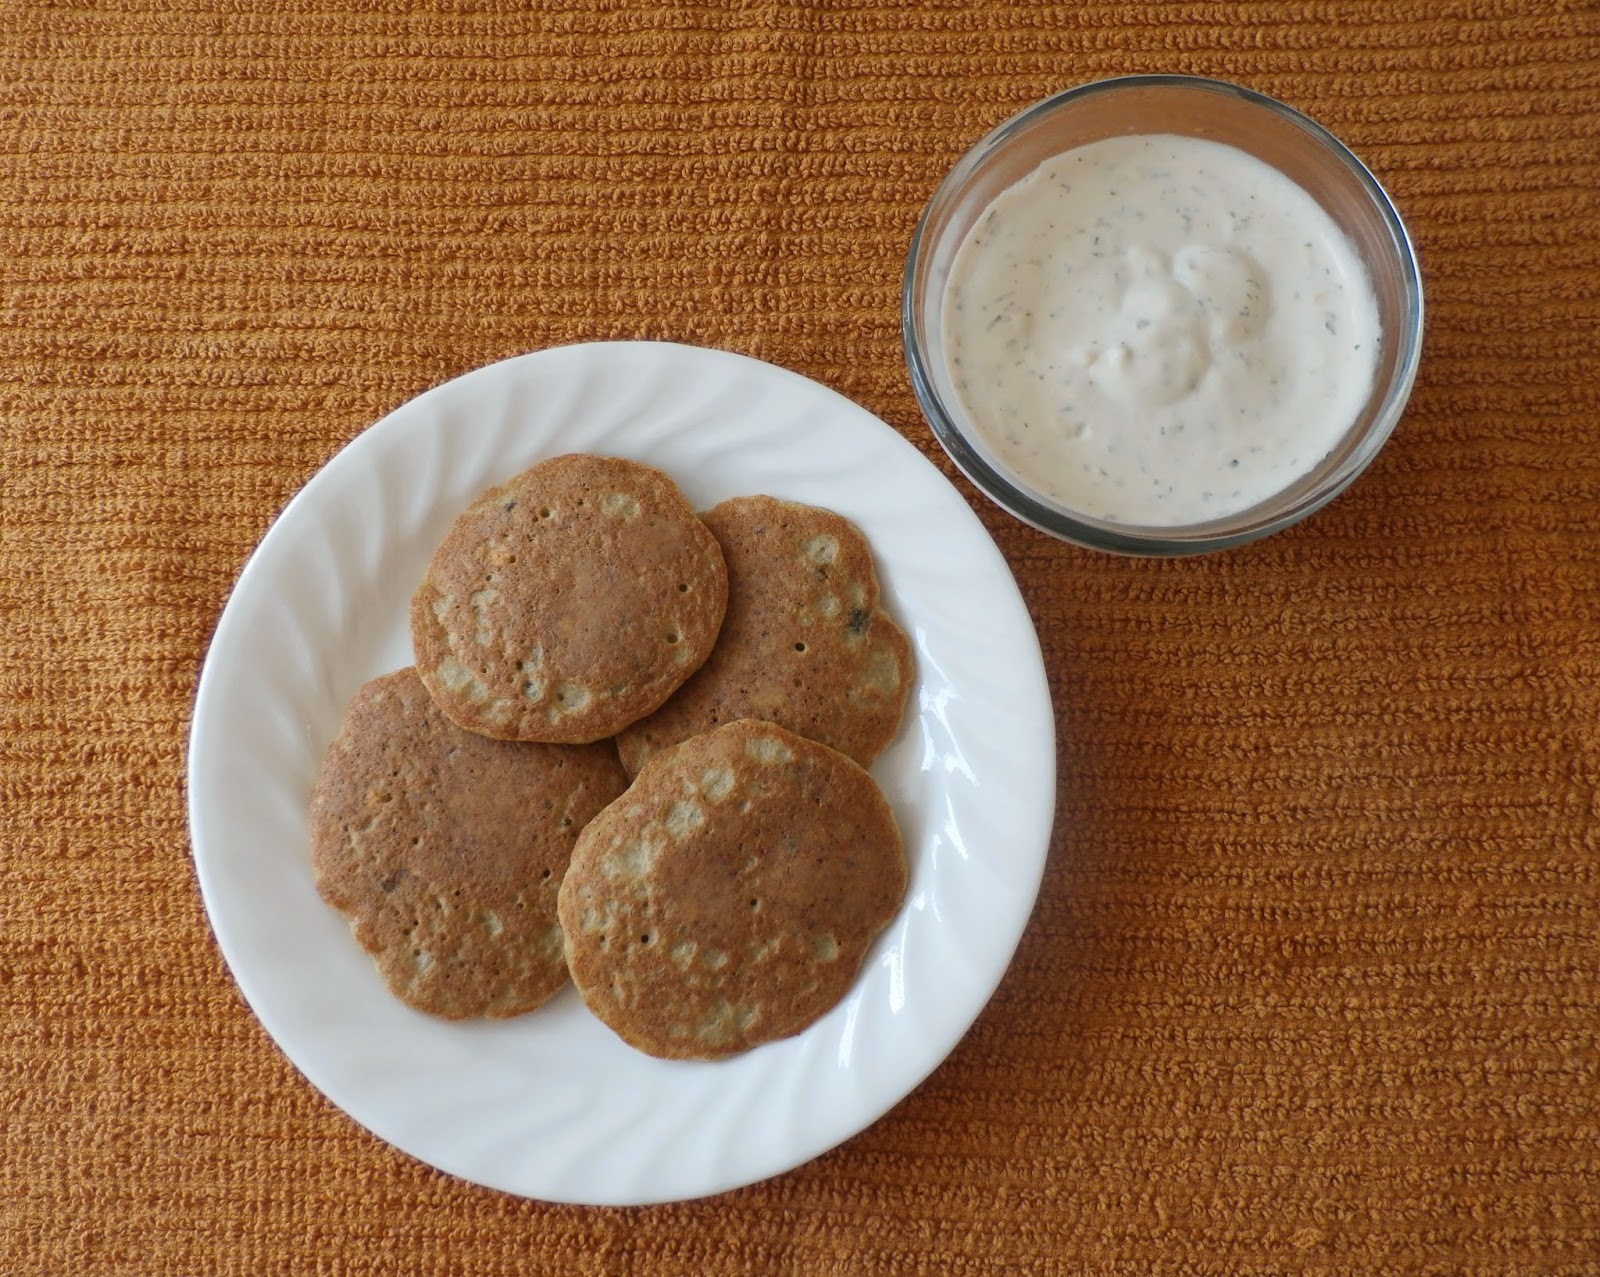
Yes, Anything Can Be a Pancake -- Even Lentils

A while back I purchased a GF magazine that had a recipe for chicken pancakes (oh, yeah!).  They also had one for garbanzo pancakes that used whole beans instead of flour.  That seemed like a good idea for any legume.

So, I decided to do it with lentils.  But, I didn't bother reading the recipe before cooking the lentils.  The recipe used soaked, but not cooked beans. And didn't use eggs or other binders.  Hmm...

OK. So, I'll make up my own lentil pancakes.

And I did.   You're welcome.

Lentil Pancakes

Ingredients

2 cups uncooked lentils
Your favorite lentil seasonings
2 T oil
1 T pepper vinegar, or your favorite vinegar
5 eggs, beaten
1/4 cup tapioca starch, or your favorite starch
3/4 tsp xanthan gum
1/2 tsp baking soda

Directions
  1. Cook lentils in water to cover plus a little more with your favorite seasonings.
    I used about 1/3 cup dehydrated mixed vegetables, a little dry onion, some garlic, salt, and pepper.  Cook them until they're mushy, adding water as needed.
  2. Using a strainer, drain as much liquid as you reasonably can from about 3 cups of the cooked lentils.  Put the lentils in a mixing bowl and let them cool. Reserve the remaining lentils for soup or another batch of pancakes.
  3. Add oil, vinegar, eggs, starch, and xanthan gum.  Stir until thoroughly mixed.
  4. Stir in the baking soda.
  5. Cook as you would any other pancake, but make them pretty small so they don't break. 
  6. Serve with cashew cream ranch dressing.
Cashew Cream Ranch Dressing

Ingredients
Cashew cream  (A little more than 1/2 cup)
Organic mayo  (A little less than 1/2 cup)
Apple cider vinegar
Lemon juice
Dehydrated minced onion
Garlic powder
Freeze-dried parsley
Dill
Salt & pepper

Instructions

  1. Add cashew cream and mayo to a bowl using about a 60/40 ratio. 
  2. Add a splash of vinegar, a squirt of lemon, and other seasonings to taste.
  3. Stir it up, then taste. 
  4. If it needs more zing, add more lemon or vinegar.  If it needs more kapow, add more pepper or salt.  If it needs more Mmmmm, add more garlic, onion, parsley, and/or dill.  If it has too much zing or kapow, or if the Mmmm is more like Ohhhh, add more cashew cream and mayo.
I won't bother giving instructions for cashew cream.  There are zillions of cashew cream recipes out there already. 

Sunday, January 13, 2013

Chicken and Not Mushy GF Pasta Soup

Spouse 1.0 and I have been sick with this year's nasty flu.  He's been sick since a week ago Friday. I've been sick since Wednesday.  It feels like I've been sick for 15 of the last 10 days.

Sick people require chicken soup.  But, what do you do when there's not a well person in the house to make it?  In the gluteney, chemical-laden, frankenfood days of yore, we simply ate canned.

Now, we do without or get by on frozen pork posole until I feel well enough to make the chicken soup.  Yeah, so by the time we get it, we almost don't need it.

Today's big challenges: The soup had to be done in less than 2 hours, including peeling and chopping. It had to be fairly easy, because I'm fairly dead.  It had to use stuff I had on hand. And, since I was making enough for at least 2 days, I had to find a way to make the pasta not turn to mush. (Stay tuned... I'm kinda proud of how I managed that last challenge!)

There's no way a less-than-2-hour soup is going to have that simmered all day yumminess of my mom's soups.  But, this turned out plenty good enough.

3 pale and slightly limp ribs of celery
2.5 iffy-looking carrots
1 onion, past its prime
Spray olive oil
1/2 TBSP butter
1.5 lbs boneless, skinless chicken breast
A few leaves fresh sage, rosemary, and thyme (and/or dry)
2 quarts of prepared organic vegetable broth*
2 bay leaves
pepper
onion powder
dry parsley
freeze-dried chives and/or onion powder
garlic powder
1 cup frozen organic peas (approx.)
8 oz. Tinkyada brown rice pasta shells**

  1. Wash and chop the celery, carrots, and onion. 
  2. Spray a soup kettle with olive oil spray and start the vegies to sauté.
  3. Rinse and dry the chicken, then cut into approx. 1 inch cubes.  Periodically stir the pot.
  4. Add butter to kettle.  Add chicken and start it to sauté with the vegies.
  5. Rinse the fresh herbs and chop them.  Add them to the pot.
  6. Add the vegie broth, a couple of cups of filtered water, bay leaves, and other seasonings.  Cover and simmer while you clean up a little and check facebook.  Maybe 20 minutes total. Chicken should be cooked through by now.
  7. Taste and adjust seasonings. Turn the burner off for now.
  8. Scoop out about half the broth into a 3 quart sauce pan and bring to a boil. Add pasta and cook until barely done, stirring periodically.
  9. Meanwhile, add the peas to the soup pot.
  10. When the pasta is done, scoop it into a separate bowl using a slotted spoon.  Do not rinse or drain.
  11. Return the broth from cooking the pasta to the soup pot.  Add a little more water if needed.  Bring to a boil and adjust seasonings (again) if needed.
  12. To serve: Spoon a bit of pasta into a bowl or mug, then add hot soup mixture. Stir to combine.
* It's somewhere between hard and impossible to find a chicken broth that doesn't contain yeast extract, autolyzed yeast, or mysterious "spices" -- all potential sources of free glutamic acid.  So, I use vegie broth in soups instead.

** GF pasta in general is a lot less mush-prone than it used to be, but Tinkyada has proven consistently reliable.  Cooking and storing the pasta apart from the soup keeps it from turning to mush.

Sorry. No pictures.  Still too sick to manage that.  But, am feeling a lot better with some chicken soup in my tummy.

Saturday, November 3, 2012

Chile Mole(ish)

Tomorrow is the neighborhood chili cookoff.  We usually don't participate in neighborhood events. Largely because there usually aren't any.

So... I've been planning.

Black beans, because all other beans are farty.

Ground pork, just because it's something I never use.

Roasted chilis, because Grebar Farms was selling chilis today.

Fresh lime basil and fresh oregano, because what is a pilgrimage to Grebar Farms without fresh herbs?

Epazote, because Mr. Grebar says it will make chili even less farty.  Not much of it because Mrs. Grebar says it's not really yummy stuff.

Chocolate, because I had some old organic baking chocolate that really needed to get used.

Purple onions, garlic, cumin, salt, pepper, & ancho chili powder because, after all, this is chili.

Cinnamon, cloves, nutmeg, allspice because that goes with the chocolate.

Tough decision: Tomatoes? Pumpkin? Both? 

So, inasmuch as chili is ever a recipe, and insofar as you can ever guesstimate measurements when you're making chili, here it is:

Chili Mole(ish)

1.5 lbs black beans
6-8 epazote leaves, optional
2-3 Tbsp chopped fresh lime basil
3-4 Tbsp lightly chopped fresh oregano
6-8 Mild to medium New Mexico chilis, roasted
1 large purple onion
6 cloves garlic
1.25 lbs ground pork
2 oz dark baking chocolate
1 16 oz can organic pumpkin puree
2 16-oz cans organic tomatoes
2 tsp cumin
1/5 tsp ancho chili powder
1 tsp cinnamon
dashes of clove, nutmeg, and allspice
Additional garlic powder, to taste
Salt & black pepper, to taste
Cilantro, optional

  1. Soak black beans in plenty of water for about 12 to 18 hours.
  2. Rinse, add water to cover (and then some), and put in a large stock pot to boil.
  3. Cook for about a couple of hours, until beans are starting to soften but not yet mushy.
  4. Add herbs, onion, chilis, and garlic. 
  5. Crumble the raw pork into the mix.
  6. When pork and onions are done, add the chocolate, pumpkin, tomatoes, and the spices.
  7. Taste and adjust seasonings.
  8. Cook a little longer, until the beans are as mushy as you like.
  9. Garnish with cilantro leaves.

Sunday, July 1, 2012

Blue Corn Posole

In my quest for a decent blue corn posole, I'm trying something a little different this time. Well, a couple of things.

Blue corn posole, dry
First, I'm crocking it.  When I've made the posole on top of the stove, I've not been happy with how the blue corn hominy cooks up.  Some pieces are solid and very chewy.  Others split apart and are... very chewy. 

I think the chewiness is just part of blue corn, but am hoping that crocking will at least help it cook more evenly.

The second thing I'm doing is roasting the pork, onions, garlic, and chilis before adding them to the stew.  The hope is for a little more depth of flavor.

Blue corn posole is a two-day process.

Day one is easy. Take the dried hominy, and soak in water to cover.  This time around, I started the soaking mid afternoon. 

Day 2 is a little more involved.

First, trim the pork of extra fat, and render it in an iron skillet.

Rendered pork fat
This provides something like unfiltered lard to use in the skillet when roasting everything. 

It also provides cracklins, which can later be used in corn bread. 

Cracklins are like unflavored bacon.  They're a hillbilly delicacy.

Cracklins
After rendering the fat, drain some of it off, and use the rest to sear the pork. 

Rub some of the fat on the seared pork, 1 quartered onion, 2 halved and seeded jalapenos, and 4 cloves of garlic.


Put everything in the oven to roast.  I'm roasting at 350 (f). 


Pork and vegs, ready for the oven
Next, wash and quarter 6-8 tomatillos.  Drain the soaking water from the posole.  Add tomatillos and posole to the crock pot, and add a couple of quarts of water.  Add salt to taste and about 1/2 tsp or so dried oregano.  Set the crock pot on low, and let the hominy and tomatillos cook while the pork and vegs roast.

Tomatillos and posole in the crock pot
Cool the pork and vegs. Cube or shred the pork and chop the vegs.  Add to the crock pot and cook about 4 hours, until the hominy is tender and the broth is tasty.  Add additional seasoning to taste.

Ingredients:

1 12 oz. package dry blue corn posole
2.25 lbs thick cut pork loin steaks
1 onion, peeled and quartered
2 jalapeño chili peppers, cut in half and seeded
4 small cloves garlic
6-8 tomatillos, quartered
About5 1/2 tsp oregano
1 frozen garlic cube, or 1/4 tsp garlic powder
1/4 to 1/2 tsp onion powder
1/4 tsp ancho chili powder
Freshly ground salt and pepper
Cilantro

Directions:
  1. Day one: Soak the posole in a covered glass bowl for at 12-18 hours.
  2. Day two: Rinse pork, pat dry, and trim fat.
  3. Cut fat into small pieces, then render in an iron skillet.
  4. Remove cracklins from the skillet and drain and reserve most of the fat. Leave about 1 Tbsp fat in the skillet.
  5. Sear the pork on all sides.
  6. Rub onions, garlic, and jalapeños with some of the reserved fat, then place in skillet with the pork.
  7. Roast pork and vegs in 350 (f) oven for about an hour or so, until pork is done. Let cool.
  8. While pork is roasting, drain and rinse the posole, then put in crock pot with about 2-3 quarts water.
  9. Add tomatillos and oregano, and start cooking on low.
  10. Remove vegs, cut onions, remove skins from jalapeños, and add to crock pot.
  11. Shred or cube pork and rub it around in the skillet to get some of the skillet liquor mixed into the meat.  Add to crock pot.
  12. Cook on low for about 6 hours, adding remaining seasonings to taste after a couple of hours.
  13. Serve garnished with cilantro.
The finished product

Saturday, March 10, 2012

Turkey Meatloaf Muffins with Pumpkin Ketchup Glaze

Last summer I bought a couple of small bouquets of fresh sage and parsley at the farmer's market, and those two little bouquets changed my life.  Or at least my meatloaf.

Meatloaf until then had always a failed attempt to replicate Mom's beef-based, tomato-infused, ketchup-topped comfort food. 

And turkey meatloaf?  A failed attempt's poor cousin.

Until fresh sage.

My first sage-infused turkey meatloaf got a cranberry sauce topping.  And, from then on, all turkey meatloaves contained parsley, sage, rosemary, and thyme.  Topped with cranberry sauce, they were once a true love of mine.

But, cranberry season ends. The stockpile of frozen cranberries dwindles. And, the container of frozen pumpkin beckons.

Many months ago I came across the term "pumpkin ketchup", mentally went "ewww", and dismissed it entirely.  But, seeing the pretty orange frozen pumpkin, the ketchup concept returned to mind.  Googled up a few recipes, but really wasn't interested in apple or mustard or the whole pantheon of pumpkin pie spices.  No, I wanted a very simple pumpkin ketchup... one that would complement the last of my fresh sage, not go to war with it.

Turkey Meatloaf Muffins with Pumpkin Ketchup Glaze

All measurements are approximate.  This is meatloaf, after all.

Meatloaf

Olive oil spray
Organic blue cornmeal (or cornmeal of choice)
1 organic red onion
3 ribs organic celery
4 oz organic mushrooms
1 2/3 lbs ground turkey with nothing added (Costco's turkey burgers work well)
3 organic eggs
1/2 cup pumpkin puree
3/4 to 1 cup gluten free rolled oats
1 tsp salt
Freshly ground pepper to taste
1 Tbsp chopped fresh sage
2 Tbsp chopped fresh parsley
1 tsp chopped fresh rosemary
1 tsp fresh thyme
Dash of garlic powder
2 Tbsp ground flax meal
Pumpkin ketchup

  1. Preheat oven to 400 (f).  Line 24 muffin cups, then spray with olive oil spray and sprinkle a little blue cornmeal in the bottoms.  The cornmeal helps absorb some of the liquid that cooks out.
  2. Chop the onion, celery, and mushrooms reasonably fine and parboil covered briefly in a small amount of water. Let cool.
  3. Mix everything  except pumpkin ketchup together.
  4. Divide meatloaf mixture evenly among the 24 muffin cups, and press down. 
  5. Divide the pumpkin evenly among the meatloaves, and smooth it down.
  6. Bake about 25 minutes, until meat is done.
Pumpkin Ketchup

1 cup pumpkin puree
1/2 organic sweet onion, chopped fine
1/4 cup organic cider vinegar
3-4 Tbsp honey
1/4 - 1/2 tsp cloves
1/4 - 1/2 tsp allspice
dash of garlic powder
salt & freshly ground pepper to taste

  1. Cook everything in a small saucepan until the onion starts to get almost translucent.
  2. Whir the mixture with a stick blender until almost smooth

Result:  Not as pretty as cranberry topped meatloaves, but tasty enough and a bit lower on the glycemic index.  Definitely a keeper.

Monday, September 26, 2011

Exquisite Turkey Meatloaf

Four turkey burger patties, totalling about 1lb 6 oz, and small bouquets of fresh organic sage and parsley from the local farmer's market. 3/4 cup leftover pumpkin from some pumpkin bread made earlier in the day.

 
Definitely time to make a not-my-mother's meatloaf.

 
So, web search to find a turkey and pumpkin meatloaf recipe.  They're out there.

 
And, by the time I got around to making mine, I'd decided to add a few things not in the online version, and I was so tired I ended up forgetting the pumpkin part.  Ooops. But, it turned out wonderful, anyway.

Exquisite Turkey Meatloaf

  • 1.5 lbs ground turkey, more or less. Preferably with no broth, seasonings, or anything weird added.
  • 2 eggs
  • 2/3 C rolled oats  (gluten free, of course)
  • 8 oz mushrooms, cleaned and chopped
  • 1 medium small zucchini, chopped
  • 1/3 C celery
  • 1 red onion, chopped
  • 1 T fresh sage, chopped
  • 1.5 T fresh parsley, chopped
  • 2 pinches dried thyme
  • 1 pinch dried rosemary
  • Salt & pepper to taste
  1.  Preheat oven to 350.
  2. Mush all ingredients together.
  3. Heat a small amount of olive oil in an iron skillet.
  4. Add  meat mush to skillet and smooth the top.
  5. Bake about 45 minutes or so, until done.

While it is baking, make the cranberry sauce:

  • 1 C fresh or frozen cranberries, rinsed
  • 1/4 C water
  • 1/3 C organic evaporated cane sugar
  • 1/2 C organic apple sauce
  1.  Cook until most cranberries pop and sauce thickens slightly.
  2. Taste. 
  3. Add more sugar if you think it needs it.

Serve meatloaf topped with cranberry sauce.  Like any self-respecting meatloaf, it's also good cold.

Note: For best flavor, use fresh organic vegetable and herb ingredients, and cage free organic eggs.

Sorry. No picture.

Monday, May 2, 2011

Goat Cheese Quiche

Imagine, if you can, a vegetarian dish so very good that Mr. Carnivore Himself, AKA The Spouse, would eat it for dinner without requesting a side of animal.

Don't get me wrong.  I'm not really a vegetarian.  Though three or four days a week you might think I was.

But, nothing says "Girly lunch" like a vegetarian entree or two. So, when I had the girls over for lunch yesterday, I had to do a goat cheese quiche.

The Crust

I adapted the crust from a recipe in Jacqueline Mallorca's book, The Wheat Free Cook.  She has a recipe for cornmeal pie crust.  I used blue cornmeal and substituted a mix of tapioca and potato starch for the cornstarch.  My other major modification: I pressed the dough into the pie pan instead of rolling it. It makes for a less even crust, but it's a lot less aggravation.

Wish I could give the recipe here, but that would be a copyright thing. 

The crust turned out OK, but next time, I may try a hash brown crust. Those are fun.

The Filling

The filling... ah, the filling.  I had more than my 10" pie pan could hold, so I made a couple of custard cups full.  Next time, I may skip the crust entirely, because the filling is that good.

1 unbaked pie crust
1 lb fresh organic spinach
8 oz organic mushrooms
2 Tbsp pecorino romano
5 eggs
1/2 C Greek yogurt (I used Fage nonfat)
1/2 C soy creamer
1/2 C almond milk
1 or 2 cubes Dorot frozen garlic - or 1-2 cloves of the real stuff
pinch of cayenne
pinch of paprika
pinch of thyme
sea salt
fresh ground pepper
4 oz goat feta

  1. Rinse spinach, discard stems. Do not dry the spinach.  
  2. Place spinach in a pan and cook on low heat until wilted.  Remove from pan with slotted spoon, and drain in collander.  You may have to cook the spinach in batches. Do not discard cooking liquid.
  3. Wash & slice mushrooms, then cook in the spinach liquid until done. Drain.
  4. Cool the spinach and mushrooms, then squeeze as much liquid out as possible. Chop coarsely.
  5. Mix eggs, yogurt, almond milk, creamer, garlic, and other seasonings.
  6. Bake pie crust 10 minutes, then remove from oven.
  7. Sprinkle romano on bottom of pie crust.
  8. Sprinkle most of the spinach and mushrooms in pie crust.
  9. Pour most of the custard mixture over.
  10. Sprinkle in most of the feta, then mix slightly to combine.
  11. Bake at 350 for about 40 or 50 minutes.
You can bake the left-over filling in greased custard cups for about 20 minutes.

Alas, we devoured most of the quiche before I could take a picture. Here's a photo of the last bits.


Wednesday, November 17, 2010

Cilantro Hummus Pizza Crust

I made two bowls of hummus for the fall potluck at work. One normal and one cilantro-lime. It was surprisingly easy.

After the potluck, I had a little less than 1.5 cups of cilantro hummus left.

Which brings us to the pizza.

I'd actually cooked a whole pound of garbanzo beans in anticipation of making the hummus, and now we have a freezer full of garbanzos.  So, I've been researching garbanzo recipes the last few days.

I found a really cool one for garbanzo pizza dough. It used a can of drained garbanzos, a half cup of wheat flour, and some other stuff. I have no idea exactly what other stuff, because I lost the recipe.

But, if drained garbanzos can be food processed with flour and other stuff to make pizza dough, then hummus can be mixed with gluten-free flour and other stuff to become pizza dough. Right?

Except.... I've both read and learned the hard way that gluten-free flours are not as forgiving of moisture variance as wheat flour is.  And, I'm well aware that my hummus doesn't have the same moisture content as drained garbanzos. So, this could be a disaster.

But, it could be an interesting disaster. And, it would use up that cilantro hummus.

I started by mixing an egg into the leftover hummus. Next, I grabbed my container of Bob's Red Mill gluten-free baking mix and added enough to make a somewhat wet and sticky dough. Probably somewhere between 1/2 and 3/4 cup.  The dough looked a little coarse, so I drizzled some olive oil in to smooth things out a bit.

I decided to bake it in a large iron skillet just in case it came out really bad. Iron skillets are indestructible.

Oiled the iron skillet, spread the dough out, and put it in to bake at 350 for about 10 minutes.

Meanwhile, I wondered, what do you top a cilantro and garbanzo pizza crust with?

I thought of all kinds of cool ideas, mostly involving things I didn't have on hand.

So, instead, I smeared some spaghetti sauce on top, then used an ice pick to extract 1/2 cup of hamburger from a frozen block I had in the freezer.  Crumbled up a leftover sausage patty. Added a few kalamata olives, some pre-shredded mozzarella and Parmesan. Next, bumped the oven temp up to 400, and cooked it for another 15 minutes.

The result was a thick, soft pizza crust, almost more like a biscuit than a pizza. Spouse 1.0 declared it a definite improvement over the thin, cardboard-like gluten-free pizza crusts you get in the stores. 


Saturday, October 2, 2010

Jambaliar

Sounds like something they'd serve on Cajun Night in the MIT cafeteria. But, no, this is not about how people from the fourth state pronounce things.

Spouse 1.0 loves, loves, loves the jambalaya at Mimi's.  He especially loves, loves, loves it over pasta instead of rice. And, any jambalaya out there is bound to contain sausage that in turn surely contains maltodextrin, dextrose, random sources of free glutamic acid, and assorted other unpronounceables.  Plus, last time I checked, Mimi's pasta wasn't gluten free.

But, it didn't start out as an attempt to give Spouse 1.0 a glutamic acid free, gluten free jambalaya-like experience. It started out as an attempt to throw something together for dinner.

Given my abscessed tooth, I was thinking I might have soft boiled eggs. Room temperature. Preferably sans pepper. Intravenously, if possible. Not something Spouse would welcome. 

Hmmm, what to fix for him?

Digging around in the freezer, I unearthed a 1 lb bag of pre-cooked shrimp from T-Jo. I had some chemical-free sausage I'd picked up at Whole Foods in the fridge. Even had a bell pepper or two.... Jambalaya!!

Problem: I have no idea what's really in jambalaya. And, with the abscessed tooth sapping my joie de vivre, I was in NO MOOD to research recipes. Besides, it's always more fun to just wing it.

So, step one: put shrimp in colander and run cold water over to thaw.

Put a large pan of water on to boil for the pasta.

Next: Cut up one 3 oz link of the Whole Foods mild Italian sausage and put it in a sauce pan.

After it browns a bit, toss in the chopped bell pepper and some pre-chopped onions. Turn heat down to low, add a little water, and cover.

Toss in a can of organic tomatoes and half a can of organic tomato paste. Cover and think about spices.

Garlic.  A bit of basil.  A pinch of oregano. Cumin. Maybe a bit of chili powder. Cayenne. Oops. Too much cayenne. Oh well.  Cover and hope for the best.

By now, the tomato & sausage mixture should be starting to boil. Turn heat really low.

Throw some gluten free pasta into the boiling water. Maybe 5 or 6 ounces. More if you like lots of pasta. Set the timer for 12 minutes, or whatever the pasta calls for.

Taste the tomato & sausage mixture. Add more cumin, basil, and garlic. Or whatever it is you think you need to add.

About 3 minutes before the pasta's done, stir the shrimp into the tomato & sausage mixture.  Cover.

When the pasta's done, drain it.

Put a little pasta in each person's bowl, top with the jambalaya-like mixture, and eat.

Not a true jambalaya. More like a jambaliar. But, not bad.  I think I'll do it again sometime.

Maybe I'll even read a recipe first.

Thursday, September 30, 2010

Modular Food: Pork and Black Bean Chili in 5 Minutes

A few weeks ago I crock potted some pork. Froze a few small containers of it, and left some out for immediate use. 

Sunday, cooked up a pound and a half of black beans. Added pre-chopped onions, celery, and carrot from T-Jo.  A little garlic. Not a whole lot of other seasonings. Froze some, left some out.

And, there's almost always some cooked brown rice around here, either in the fridge or the freezer.

So, last night I finally got around to one of the combinations I'd intended when making the pork oh so many crock pot sessions ago: Pork and black bean chili.

Very easy:

  1. Grab a container of pork from the freezer and pop it in the fridge before you leave for work -- about a cup or so.
  2. Also grab a container of precooked black beans, preferably one in which you've put lots of the black bean juice.  Maybe 3 cups total. or 4?
  3. When you get home, dump the pork and black beans into a pan and shred the pork with a fork.
  4. Get it started heating while you finish adding stuff:
    • Pre-cooked brown rice - maybe a cup?
    • Some tomato paste - about 1/2 or 2/3 of a 6 ounce can.
    • Dehydrated garlic, chili powder, cayenne - to taste 
    • pre-chopped onions from T-Jo - probably 1/4 or 1/2 cup
    • A dash of salt
Boom. You're done. Chili in 5 minutes, and only one pan and a few freezer containers to wash.  It probably won't win any prizes in a chili cook off, but it is easy, healthy, and fast.


Monday, August 16, 2010

Super Easy Cilantro Lime Brown Rice

Much as I love Green Olive Chicken, I'm just not ready to have it again. But, that's OK. Salsa Chicken is even easier.

So, not quite knowing where I was going with this week's menu, Saturday morning I put a family pack of boneless skinless chicken in the crock pot. I grabbed the vat of organic salsa from Costco and poured a couple of cups over it, then set off on the usual weekend errands.

Come dinner time, I discovered there was only a half cup of brown rice left. Enough for a meal or two for me and Spouse 1.0, but not enough to justify the effort of sauteing, opening a can of tomatoes, and all the ingredients that would go into even the easiest Spanish Rice.

I thought of cheating and just cooking it with some of the Costco salsa. But, then I remembered seeing the words "Cilantro Lime Rice" somewhere... maybe when scanning through recipes online while looking for rice pudding, maybe on a restaurant menu.  Anyway, I figured, "How hard can it be?"

And, for once, the answer was: Not hard at all.

Recipe:

1/2 cup of brown rice
1 cup of water
A big splash of bottled lime juice (maybe 2 or 3 T?)
Tiny dash of granulated garlic
Dash of salt
3 cilantro ice cubes from Trader Joe


Rinse the rice, then mix it and everything except the cilantro in a pan.  Cook until the rice is nearly done, then stir in the cilantro ice cubes.

Obviously, you can make this even easier by using leftover brown rice, and just reheating with all the flavorings.

The super-easy chicken and rice became part of an almost-easy taco salad dinner, plated as follows:

Layer lettuce and tomatoes on the plate.
Place about  1/3 to 1/2 cup cilantro lime rice in the center.
Top the rice with about 3 to 3.5 oz of the cooked chicken.
Spoon reheated refried beans over all in an X.
Drizzle salsa inside the beanly spokes.
Sprinkle a few canned olives around the edges.
Top with a tiny fluff of shredded cheese.

One of my favorite meals, even though lettuce washing doesn't count as "easy."

Thursday, August 12, 2010

Sesame Soy Roast Beast

David bought some recipe cards before we were married. Why a man who would rather die than cook had recipe cards... That's a mystery to me.

And, why we still have those cards nearly 23 years later is also a wonder.

One of those cards is for sesame soy marinated chuck roast.

Well, last Saturday I had sirloin, not chuck. And, I didn't have time to marinate and roast.  I wanted to crock pot the thing. I couldn't find a "safe" Worcestershire. David shouldn't have corn starch. I wasn't about to add to the roast's calories with butter. And, I had left-over two-buck-chuck white zin, not sherry.

But, other than that, I mostly followed the recipe. Sorta.

After a few hours, my 2.5 lb roast had been reduced to about 24 ounces. A bit anorexic, but enough for 4 meals.

The best part was, three of those meals were FAST.

Monday I warmed up some of the beef in a small pot. I put the two left over potatoes on top. Vegs in a separate pan. Not only were we door to table in about 15 minutes, we only had two pans to wash!


Wednesday I heated up some more of the left over beef in a small pan.  Mixed up a little left over red rice and lentils in a non-stick skillet, and cooked some vegs in another pan. Door to table: About 15 minutes.


And, tonight we had the last of the roast.  I cheated on the healthy thing and used normal instant mashed potatoes.  They had preservatives, but not nitrites.  And, again, door to table in about 15 minutes.


Woo hoo! Dinner in almost microwave time, 3 nights this week!

The adapted recipe:

1 Tbsp sesame seeds
1/2 cup strong coffee (or just sprinkle on a packet of Via)
1/2 cup (or less) soy sauce
1 Tbsp vinegar (I used balsamic)
1/4 cup Two Buck Chuck

Put all that in the crock pot with your roast, and cook until the meat falls apart.  When all is done, add a little arrowroot dissolved in water to thicken the au jus a little.